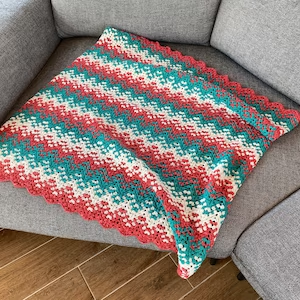
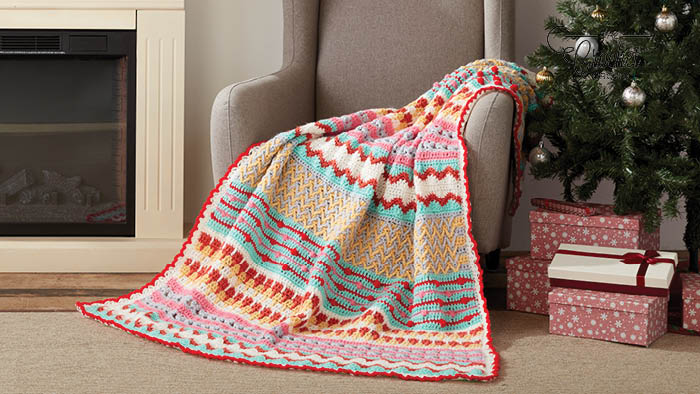
Happy Holiday Throw Pattern Crochet
Gather Your Supplies.
Bring warmth and holiday cheer to your home with this festive thrown crochet pattern! With easy-to-follow instructions and plenty of potential for customization, you can transform any room into a cozy winter retreat. Before you get started, make sure to gather all the supplies you need to crochet the perfect holiday throw. You will need yarn in a color of your choice and an appropriate-sized crochet hook. You may also want to have scissors on hand. Finally, you can use plastic yarn needles for seaming if desired, but these are not necessary for success.
Before beginning your journey, take note of the important material and equipment you need. Yarn generally comes in a variety of sizes categorized with numbers called “weights”, so be sure to select an appropriate weight according to the pattern requirements. A crochet hook should usually match the yarn size; refer to the packaging for recommended hook size or use a gauge if needed. If desired, it’s also helpful to have some scissors handy while working so that you can precise-cut bits and pieces when they get too long, as well as cut off fraying ends of yarn as needed. Finally, plastic yarn needles can help you weave in all loose ends and give your finished item a professional touch.
Learn Basic Crochet Stitches.
Before you start your holiday throw, you will need to learn and practice some crochet stitches. The most common and basic stitches used in this pattern are chains (ch), single crochets (sc) and double crochets (dc). The pattern will explain how to make each of these stitches, as well as the number of chains or rows that you need to make. With a little practice, you will have no problem creating beautiful stitches on your throw.
Chain and Single Crochet a Rectangle for Your Throw.
Start with the foundation chains. For this pattern, you need to chain 83 stitches. Once complete, you will begin your single crochet stitches in the second chain from your hook. Single crochet into each of the following chains until you reach the end (82 single crochets). Keep repeating this row until you have reached a total of 28 rows. At this point, you will be done with the rectangle portion and are ready to move on to shaping your throw.
Increase in Each Row to Create the Shape of Your Throw.
To shape the throw, you will be continuously increasing rows. This is done by single crocheting 3 stitches into the same stitch. Once this is complete, continue with single crochet until you reach the end of your row. You want to repeat this pattern for a total of 10 rows but take note of the increases each time (starting from 21 increases until you reach 55 increases). When completed and blocked, your throw should measure approx 64”x48”- perfect for cuddling up on cold winter days!
Add Edging for a Refined Look.
Now you’re ready to add a beautiful edging to your throw. This will give it a professional, polished look. To do this, chain one and then single crochet in the end of each row – repeat this process for all 4 sides. Once at the corner, repeat the stitch for 3 times so that you don’t miss any stitches and keep your pattern even. When finished, tie off your yarn and enjoy your awesome new throw!
Adding an edging to your throw can give it a much more finished and refined look, which is great if you’re planning to give the throw as a gift or keep it yourself. There are lots of different edgings you can use, depending on what kind of look you’re going for. For something extra special, try adding a double crochet along the edge – this creates a beautiful and delicate textured border. Whatever edging you choose, make sure that your hook size matches that of your original pattern to ensure a good fit. Enjoy!