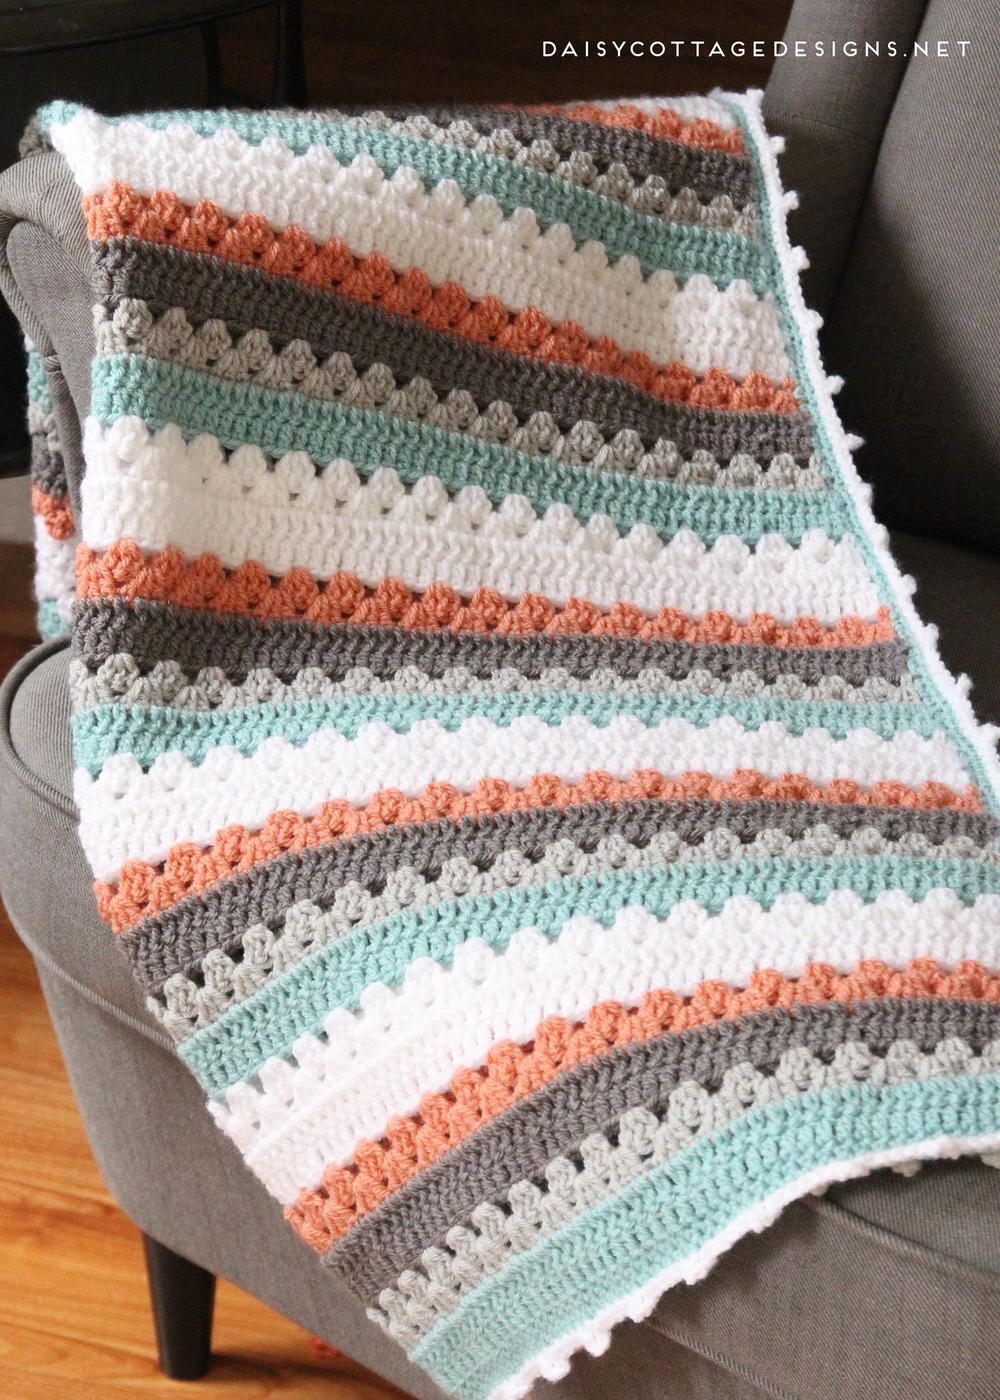
DIY Crochet Simple Stripes Blanket Tutorial
Give your home a touch of coziness with this easy crochet blanket! With its simple striped pattern, it’s the perfect project for beginner crocheters. Follow our step-by-step tutorial to learn how to make this beautiful blanket in no time.
Gather Your Materials.
Before you get started, be sure to get all your materials ready. You’ll need a medium weight yarn of your colors of choice, an appropriate size crochet hook, and a pair of scissors. Make sure to check the label on your yarn for the recommended crochet hook size before starting – it should be listed there! Once you’ve gathered all your materials, it’s time to start crocheting!
Chain and Row Basics.
Before you can start your stripes pattern, it’s important to learn the basic crochet stitches – chains (ch) and single crochet (sc). To begin your blanket, make a foundation row of chains with your chosen color. Then single crochet in each chain across the row. When you reach the end of the row, turn and repeat the process if continuing with the same color or switch colors as necessary. Repeat until you achieve the desired width of your blanket!![]()
Depending on the pattern, you may choose to alternate the colors every two rows, five rows, or even an entire section of your blanket. As long as you can count each row consistently, the simple stripes blanket pattern can be adapted to fit any color scheme or size of project. With practice and patience, your simple stripes crochet project will turn out stunning!
Step-by-Step Stripes Pattern.
The stripes pattern is simple and easy to make. To begin, make a foundation row of chains in your main color that’s the same width as your desired finished blanket. Single crochet into each chain across the row and turn. To add a stripe, switch colors and single crochet into each single crochet from the previous row. Turn and repeat until you have reached the desired length for your blanket.
You can make this blanket with any combination of colors and stripe sizes. Just ensure you work the same number of rows in each color, and that all foundation chains have the same length so that your blanket edges look neat and even. If you prefer to mix it up more, you can try adding a new color every other row instead of having longer stripes. Experimenting with variegated yarns will also give unique and eye-catching results!
Finishing Off the Crochet Stripe Blanket.
When you have reached the desired length for your blanket, fasten off and weave in the ends. To create an edge, you can use a single crochet border around the edges, beginning at one corner and working your way around the entire blanket. This adds a nice finished look to your project. When that’s done, enjoy your handmade work of art!
Blocking Your Blanket for a Professional Look.
Blocking your blanket is an important step to take in order to maintain a professional look that makes it look as if it was professionally made. Blocking helps the stitches of your crochet blanket keep their shape and ensures that all the sides of your finished piece are level. To block, pin your blanket out in its desired size on a flat surface and steam press with a steam iron for about five minutes until completely dry. Give the edges of your blanket a final check before gifting or giving away!
Blocking your blanket is a surprisingly easy process, but will make a big difference in the look of your finished project. If you’re using 100% cotton yarn to make your crochet blanket, it shouldn’t shrink or lose its shape. However, if you want the stitches to appear more even, or if you find that some of the stitches are not as defined as others, blocking can help to correct this. You’ll be able to see where stitches should be placed and ensure that all sides of the blanket are level and uniform. Blocking takes only a few minutes, but has a dramatic effect on the appearance of your completed work!

